Create a Model-to-Model Mapping
Create a Mapping between source and target class
Let's start by defining the target class, for which we would like to create the mapping.
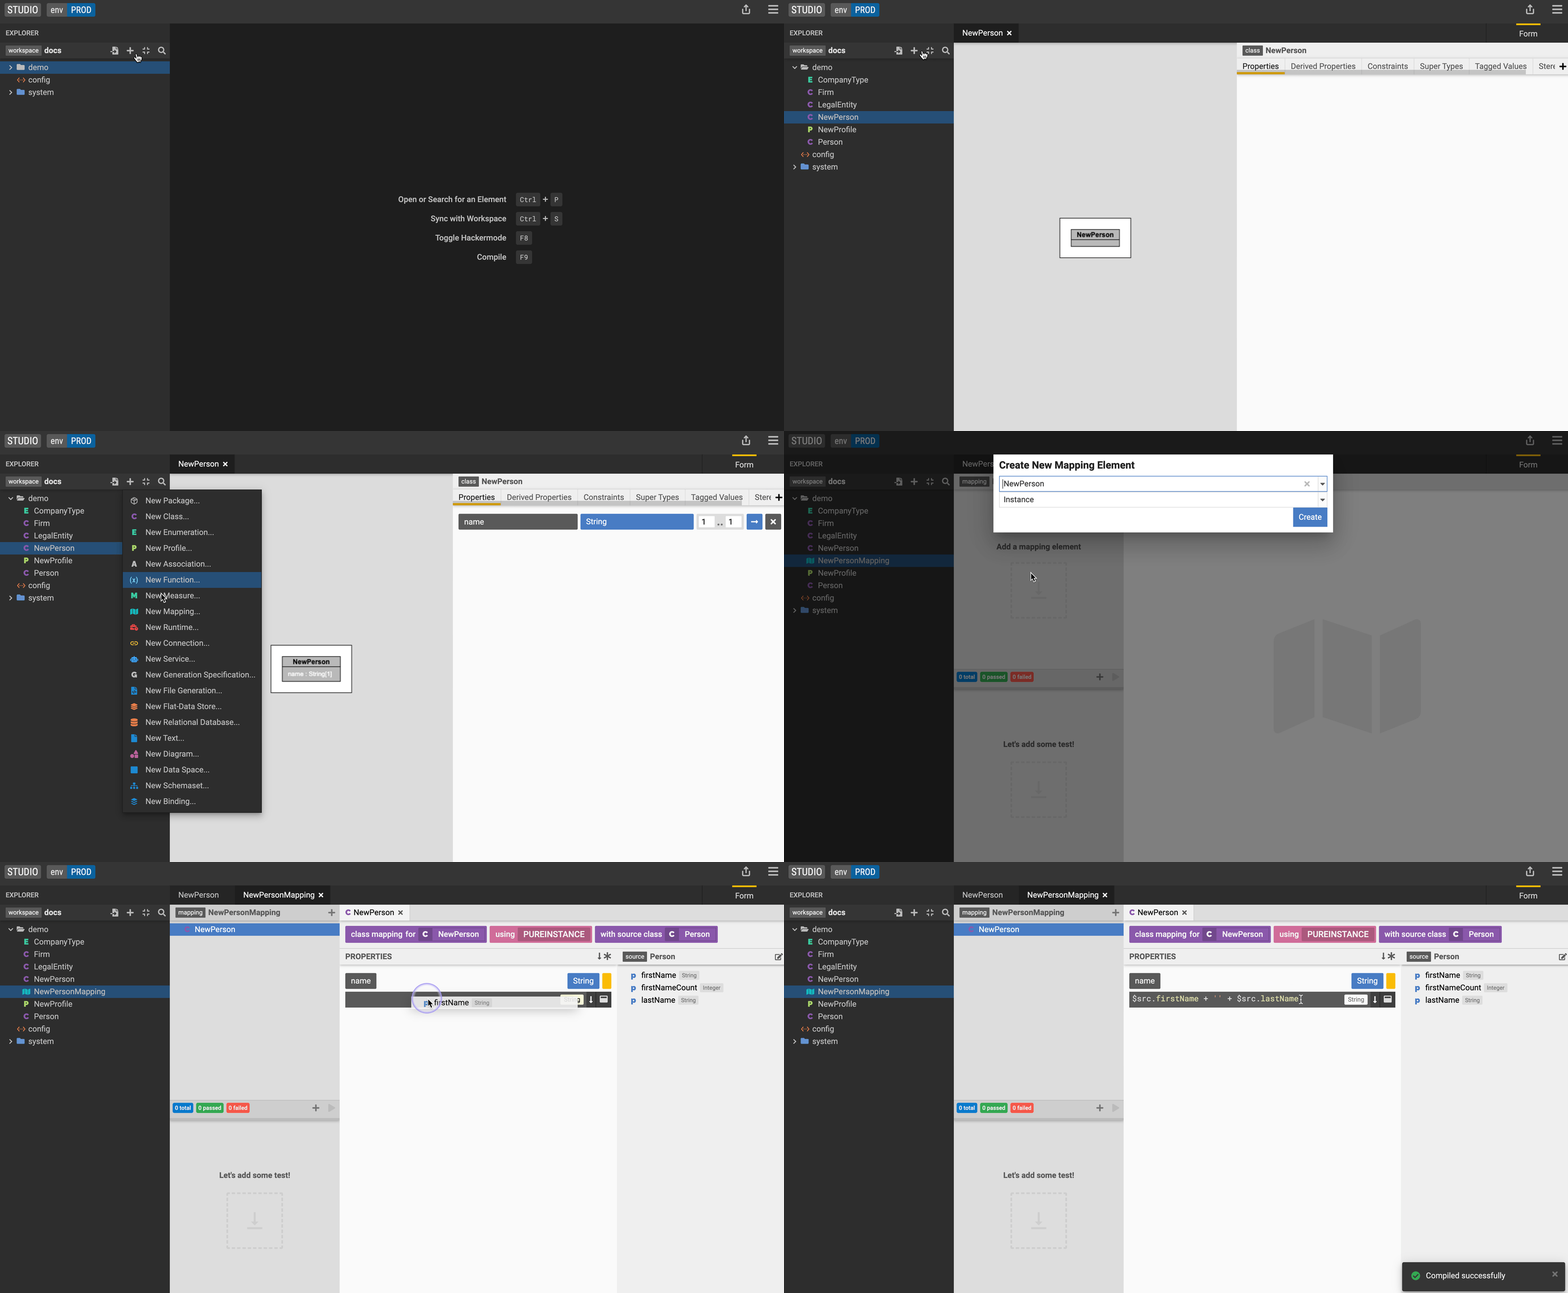
- Create a new class called
NewPerson. - Add a property to
NewPersoncalled name. Make the property a string with a cardinality of 1. - Add a property to the existing
Personclass called lastName. Make the property a string with a cardinality of 1. - Click the+ icon and selectNew Mapping to create a new mapping called NewPersonMapping.
- Drag and drop the NewPerson target class into the Add a mapping element section on the left.
- Hit the Create button using the default setting.
Define the source class for our mapping and specifiy the transformation.
- Drag and drop the
Personsource class into the Choose a source section on the right. - To specify the transformation, add the following expression for the name property:
$src.firstName + ' ' + $src.lastName. You can also drag and drop the firstName and lastName properties from thePersonsource class into the function panel.

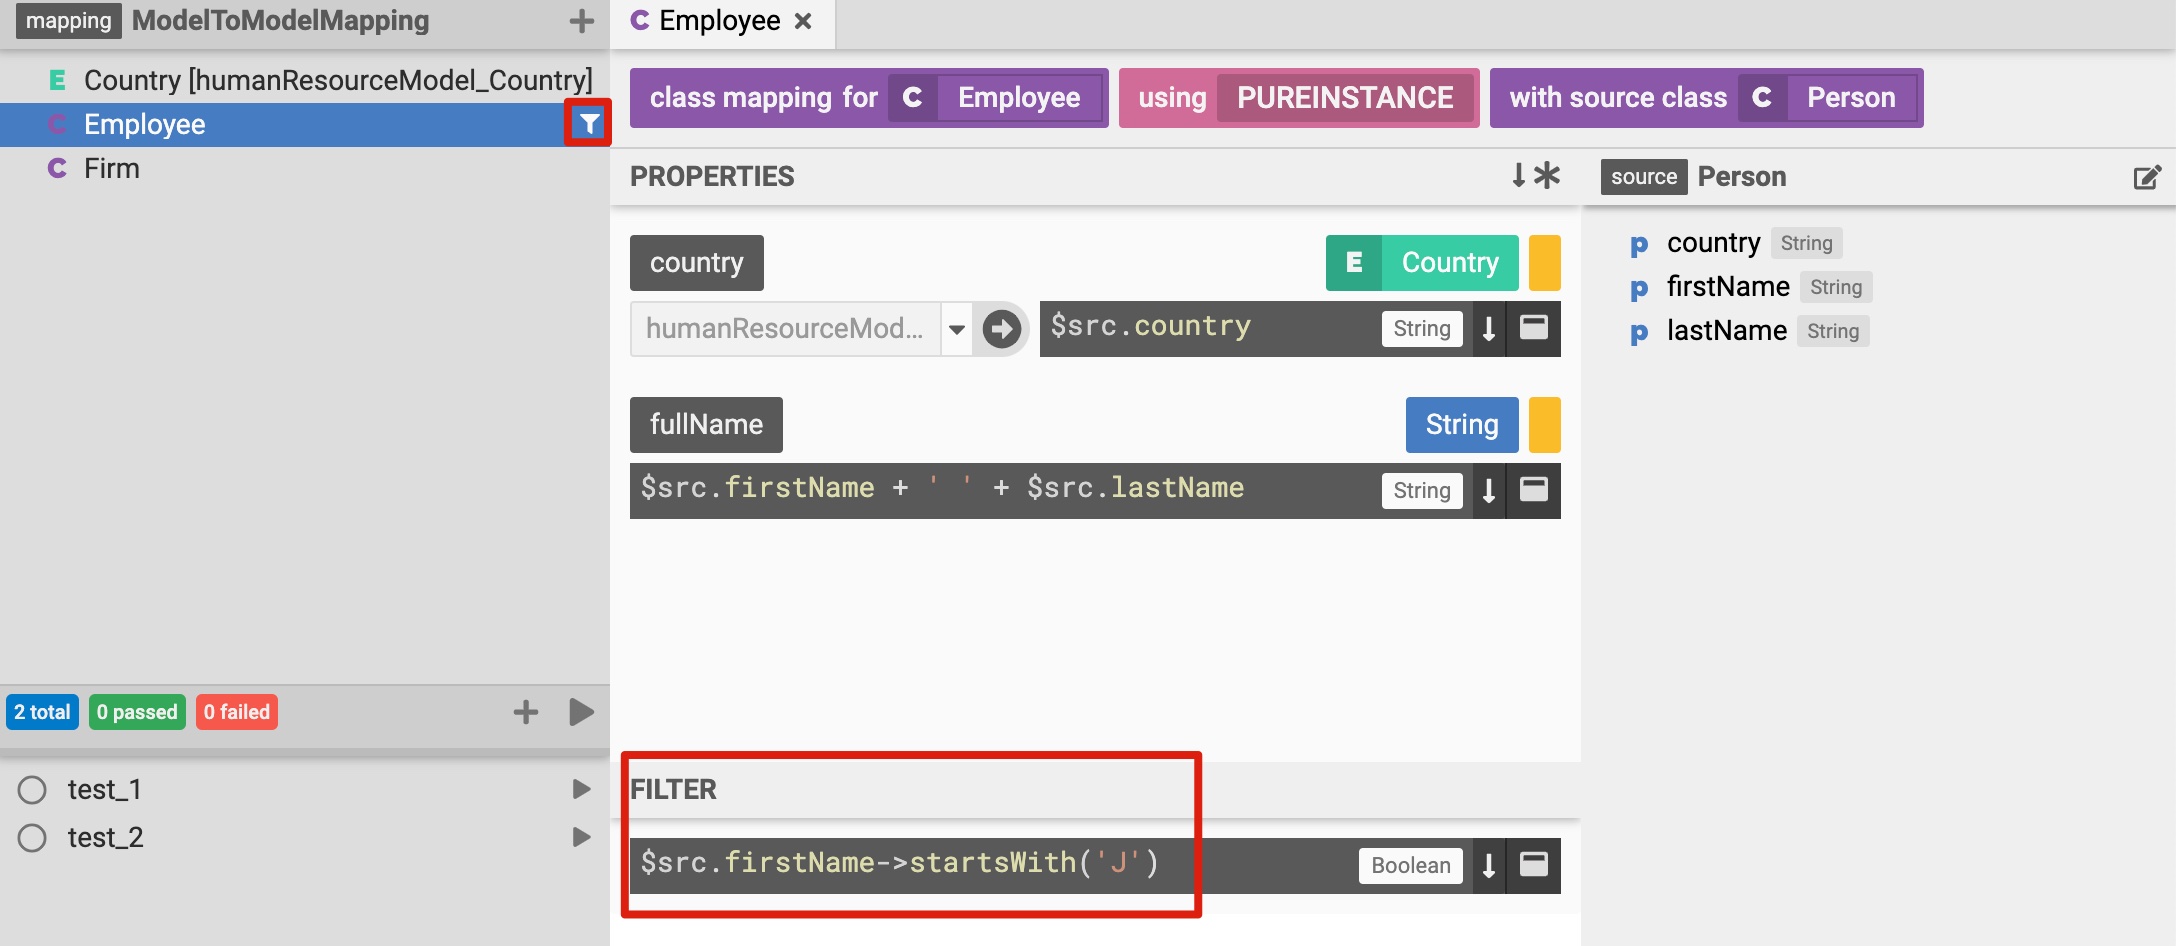
Add a filter to model-to-model mappings
This allows you to further restrict the values they would like to retrieve as part of the defined transformation.

Create a Mapping Test
Legend provides an execution feature to run queries, constraints, and model-to-model/model-to-database transformations. You can use live data (pulled from physical data stores) or generated sample data as inputs to the executions, and review the results to test your model as you build it.
You can save these tests and continue to enhance your data models with the comfort that your changes can be tested against expected results.
It is good practice to add test to any mapping that you specify:
- Right click on the
NewPersonclass and selectTest. Alternatively, you can click on the + icon in the bottom left panel to add a test.
Create a sample query to test if the model-to-model mapping executes correctly:
- Click on the pencil icon to edit your query.
- Create a very simple query. Make sure to select the Graph fetch option for model-to-model queries. Studio does not currently support Projection queries on top of model-to-model mappings. Drag and drop the name property from the explorer panel into the fetch structure panel.
- Hit the Save query button.
Refer to the create a query section of the docs for more detailed information about the Query Editor
Studio generates sample input data for your defined query. You can also modify it if you want:
- Hit the generate Result icon.
- Congrats! You now have a mapping test and can run it any time to validate the execution of your model-to-model mapping.
Execute a Model-to-Model Mapping
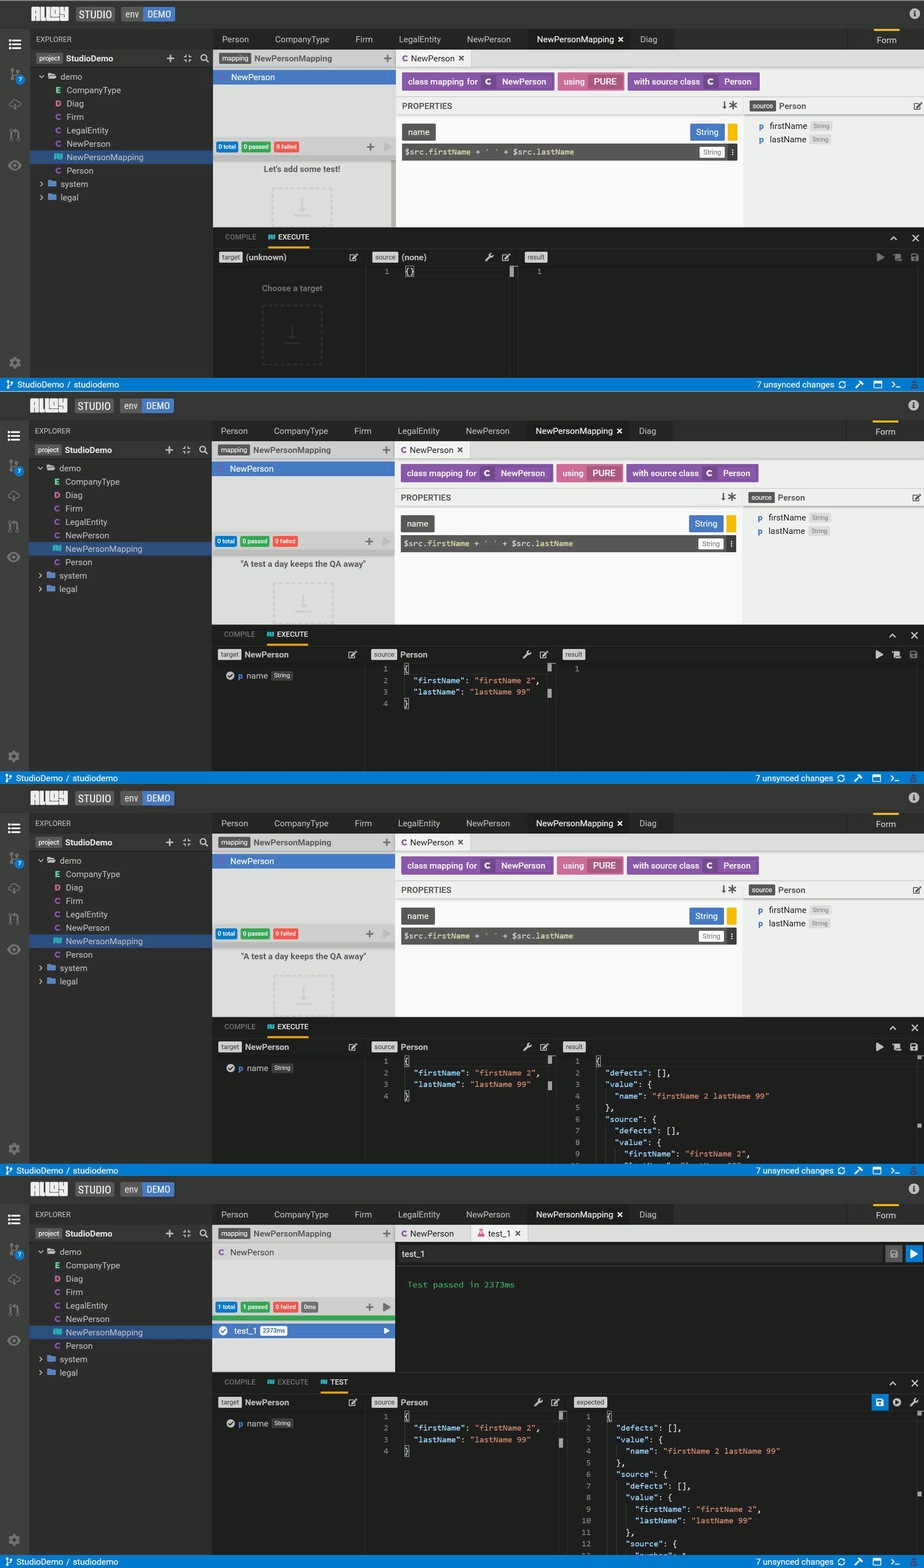
Drag the Execute panel up from the bottom of Studio screen.
Select the edit button to select the
NewPersonclass for testing. Then select the attribute(s) to test. The source model is auto-populated.Execute the mapping and review the results.
Save this execution as a test to run as part of the pipeline.

You can promote this ad hoc execution to a test by clicking on the beaker icon.
Execute a Model-to-Model Mapping with Constraints
Remember that we can add a constraint on classes? We can also execute model-to-model mappings with constraints to check if the constraint criteria are violated.
Let's create a constraint on the NewPerson class that checks if the name value is empty $this.name-> == ''
- Right click on the
NewPersonclass and select Execute - Create a sample query by clicking on the pencil icon
- Drag and drop the name property from the explorer panel into the fetch structure panel
- Select Check graph fetch
- Hit the Save query button
- Let's remove the firstName test data to intentionally violate the constraint criteria that we specified on our
NewPersonclass - Hit the Execute button to execute the defined query
Studio will show a defect with the details about the violated constraint. Constraints can be both on source and target classes.